This how to is related to Rebuilding / Servicing "Pancake" Power Quarter Window Motor for the 1969 - 1973 Mercury Cougar & 1971 - 1973 Ford Mustang.
Years ago we found an older gentleman who understood these unique motors and would "recondition" them for us. Ruben passed on some years ago and we have been searching for another individual to take them on for us but alas, all the specialty places we send them to say, "No way, we do not know how" or "These just were never designed to be serviced."
Armed with what Ruben shared with me, Felix, Richard and I decided we would tear into a few dead ones and see what we could do to resurrect them. What could it hurt? We had everything to gain since demand is huge and nothing to lose since our pile of dead motors was just taking up shelf space.
First off, we knew that they could not really be "rebuilt" as you would apply the term to a conventional electric motor. At best we could only claim they can be "reconditioned" but maybe the best term to label our units would be "cleaned up".
The number one thing that kills these motors is water. These units will self destruct over time with just a drip or two of water entering them once a year. The problem is a "drip or two" will enter but has no way to escape and soon you have a substantial amount of water inside them. No matter what, these units need to keep dry. Replace your belt-line kit if it is bad and maybe it would be a good idea to shine a flashlight inside your quarter panel while you wash your car or have it in the rain just to see if any water is making it inside your quarter panel.
Before you proceed to the video and pictures below keep in mind we are full blown rookies when it comes to electrical work. We just took these on because the "Pros" from one end of this country to the other claim they cannot even figure out how to take them apart.
If we can do it, there is not reason why you can't too!
If you still have questions, check out our detailed pictures and instructions below.

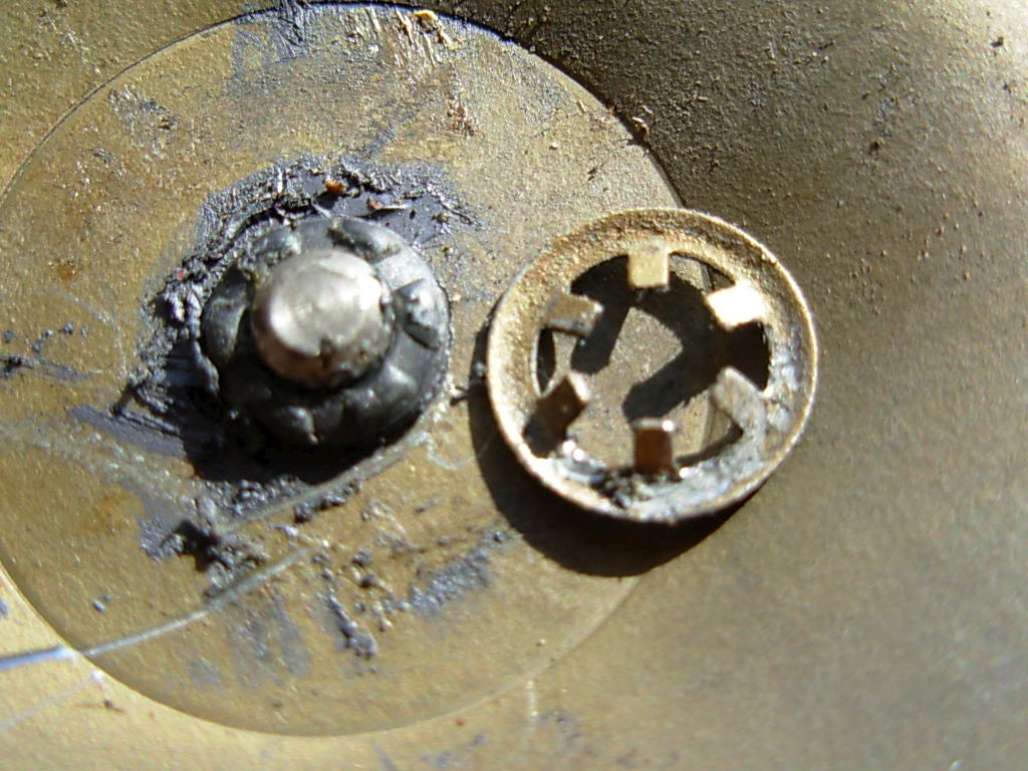
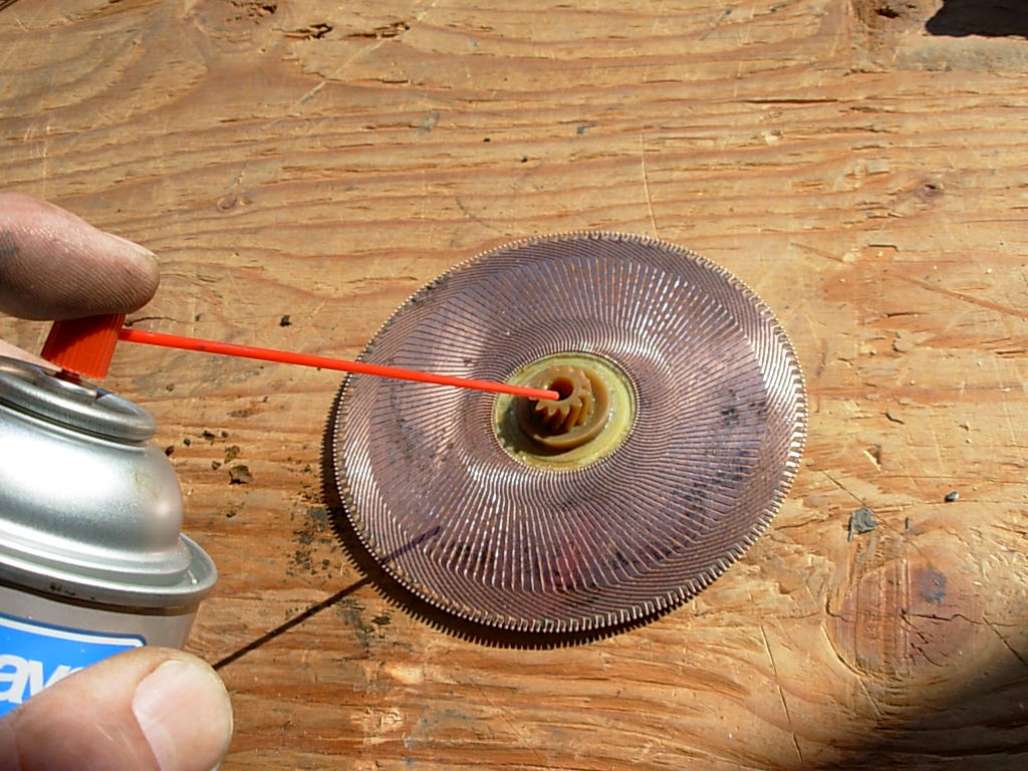
Your first challenge will be to separate the regulator from the "pancake" shaped motor. Chances are, when the motor died it was blocking one or more of the three mounting screws. "Backing" the motor off manually will be fruitless, you have to bend the regulator as shown below so as to pull the teeth from the regulator away from the teeth of the motor drive gear. Not to worry, it will bend right back down into place later.
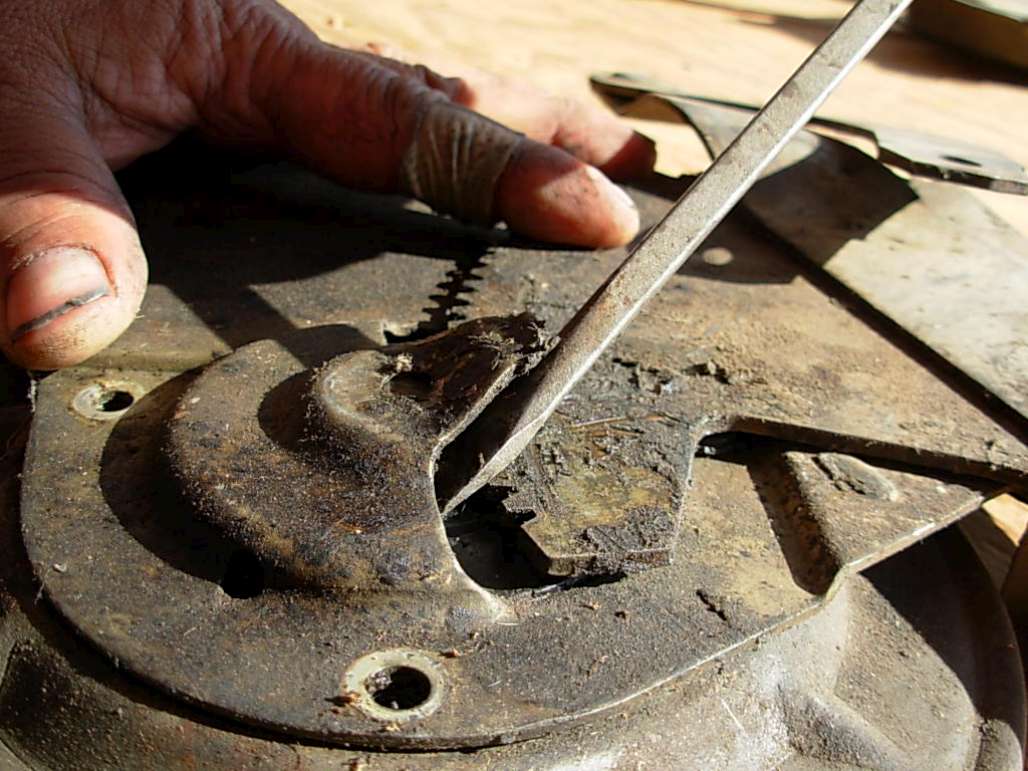
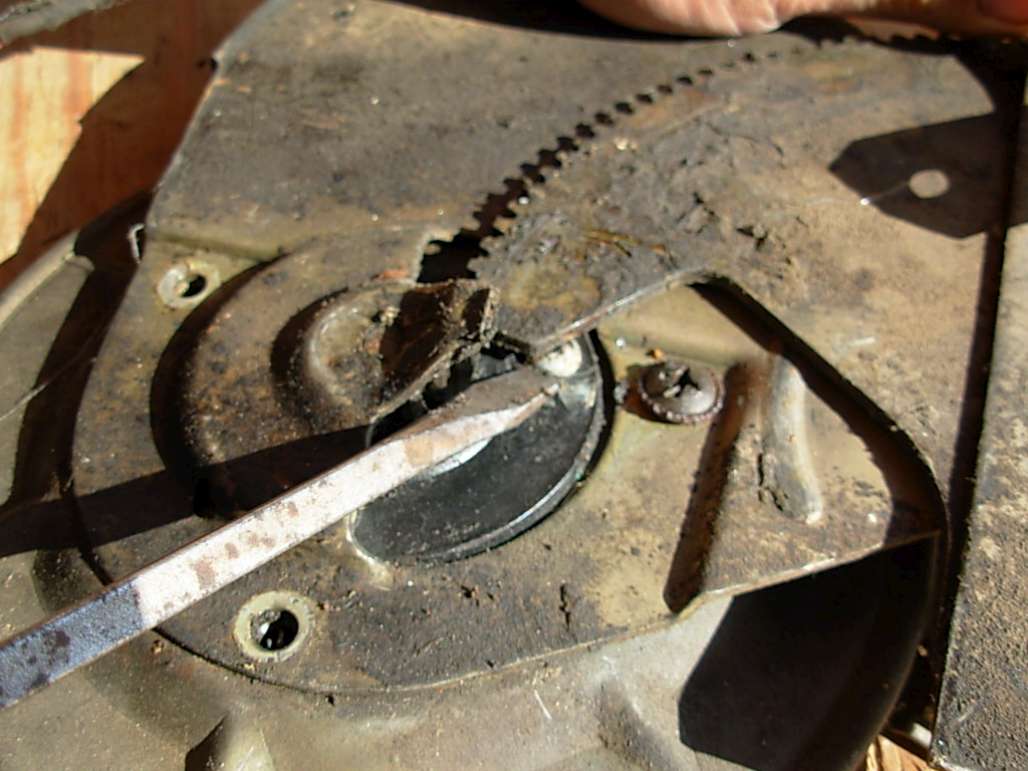
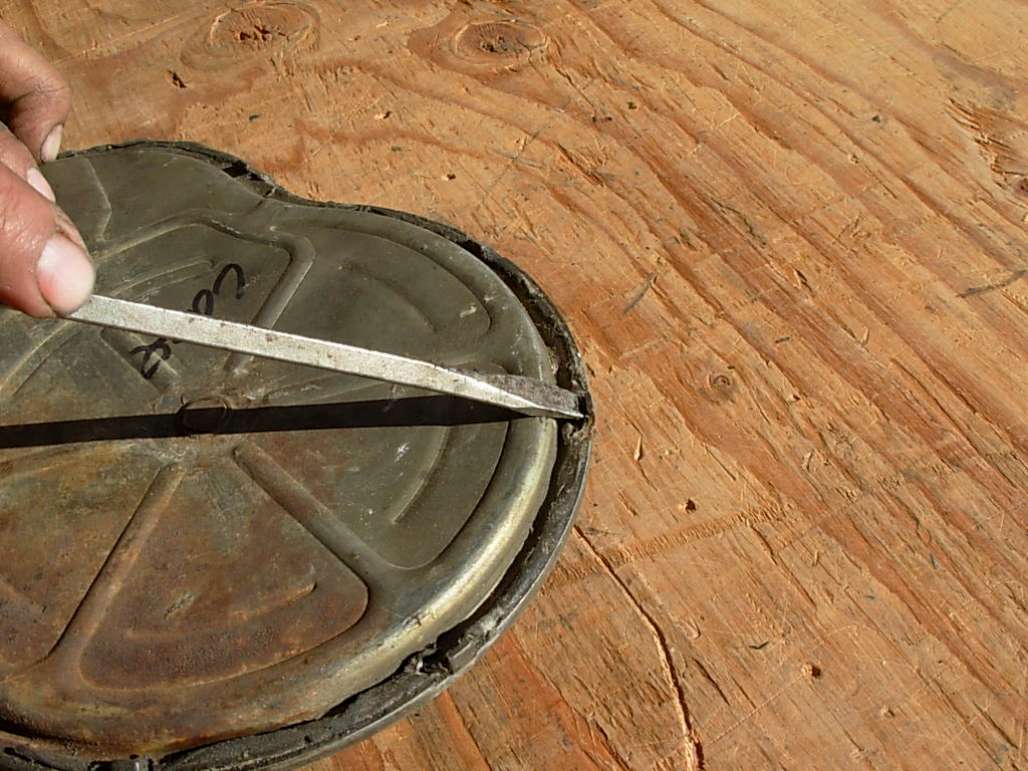
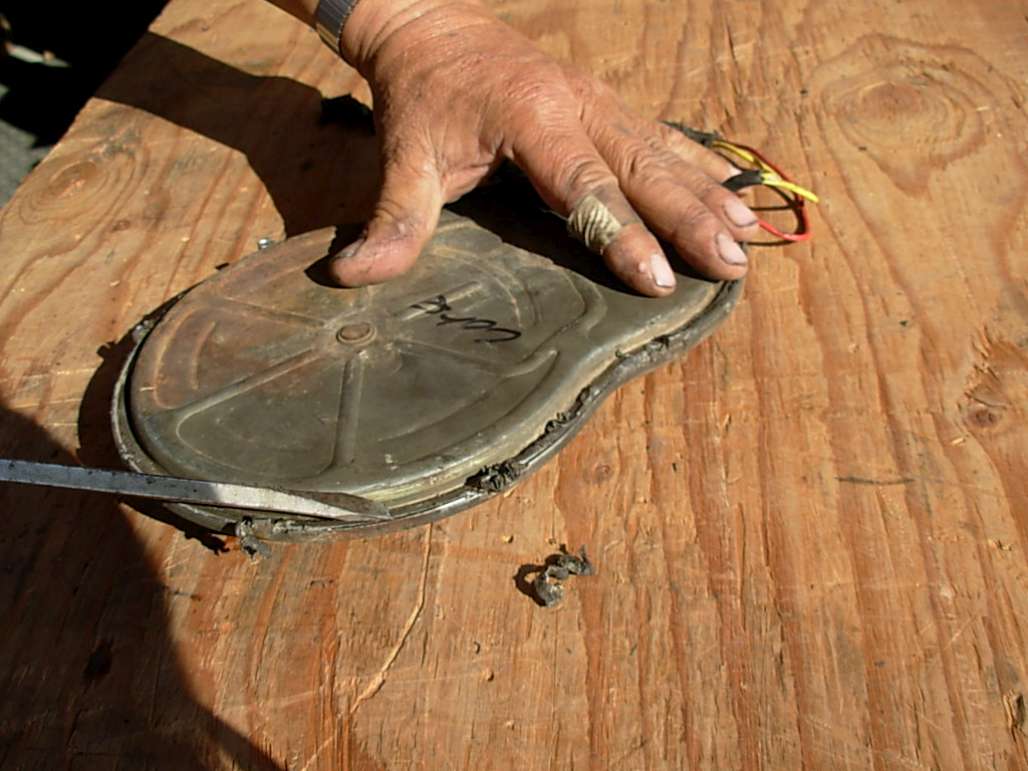
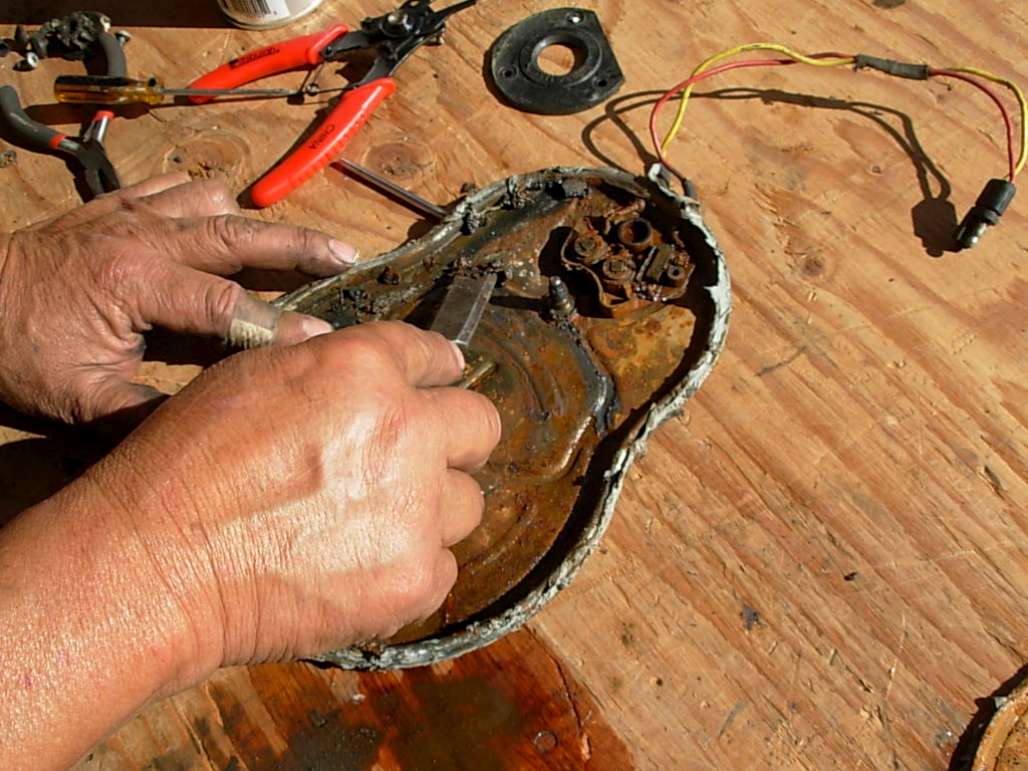
Next you can start to separate the two halves of the motor case. Open the tabs only as far as needed so as not to break them off.

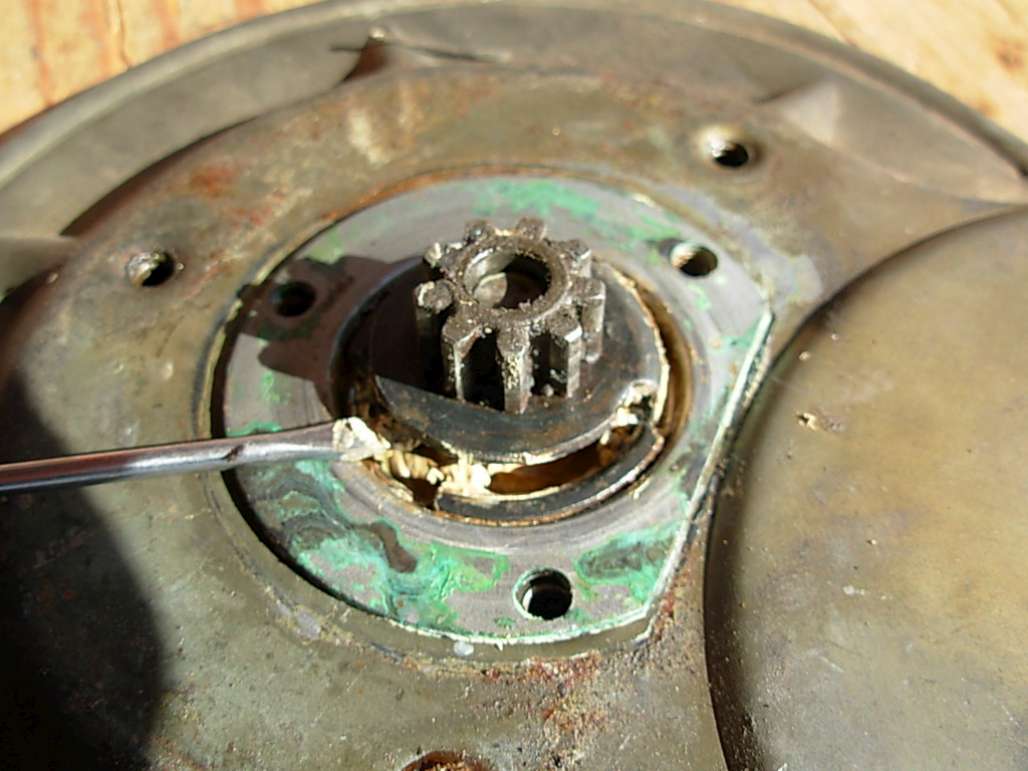
Next you will need to scrape the hardened sealant off. We have used butyl type windshield sealant with success. It needs to stay pliable over time.

Take off the rubber seal / cover around the drive gear.
Be careful not to break this little clip, gently "walk it off" by gently lifting under the edge with a small screw driver. Work your way around the edge a little at a time. Patience is needed here, keep in mind this process could take you hours before you are done with both your motors.
The drive gear pries right off, no clips of fasteners hold it in place.
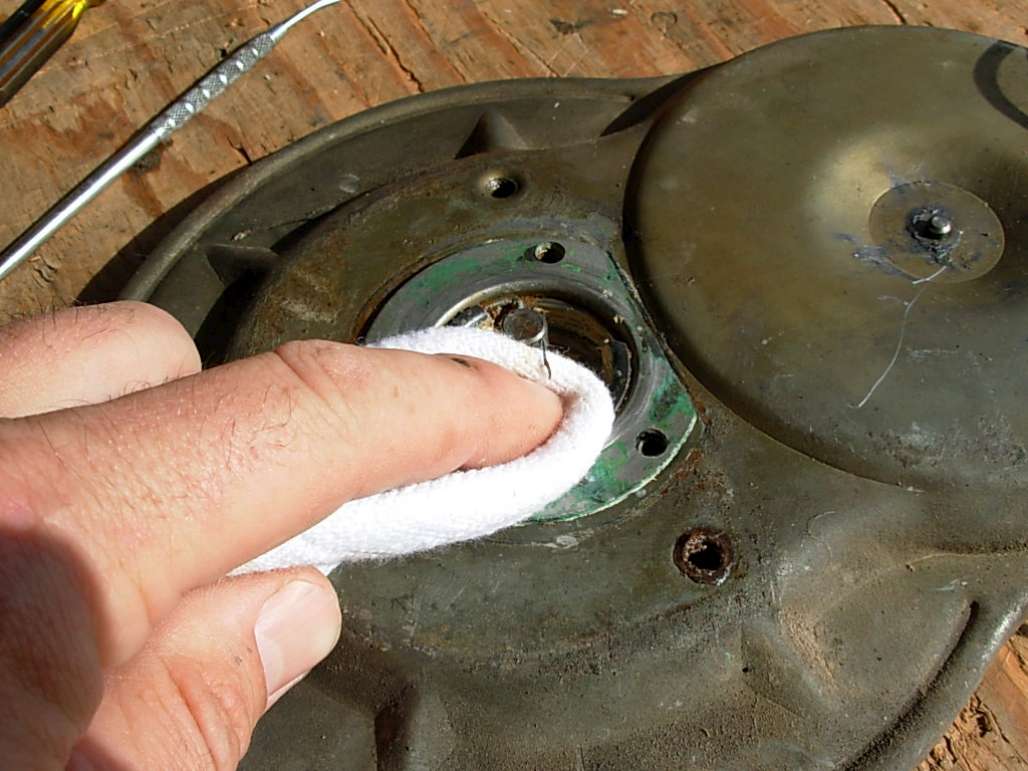
Start cleaning as you go. You will have to wipe away the old hard grease to find the snap ring and remove it.
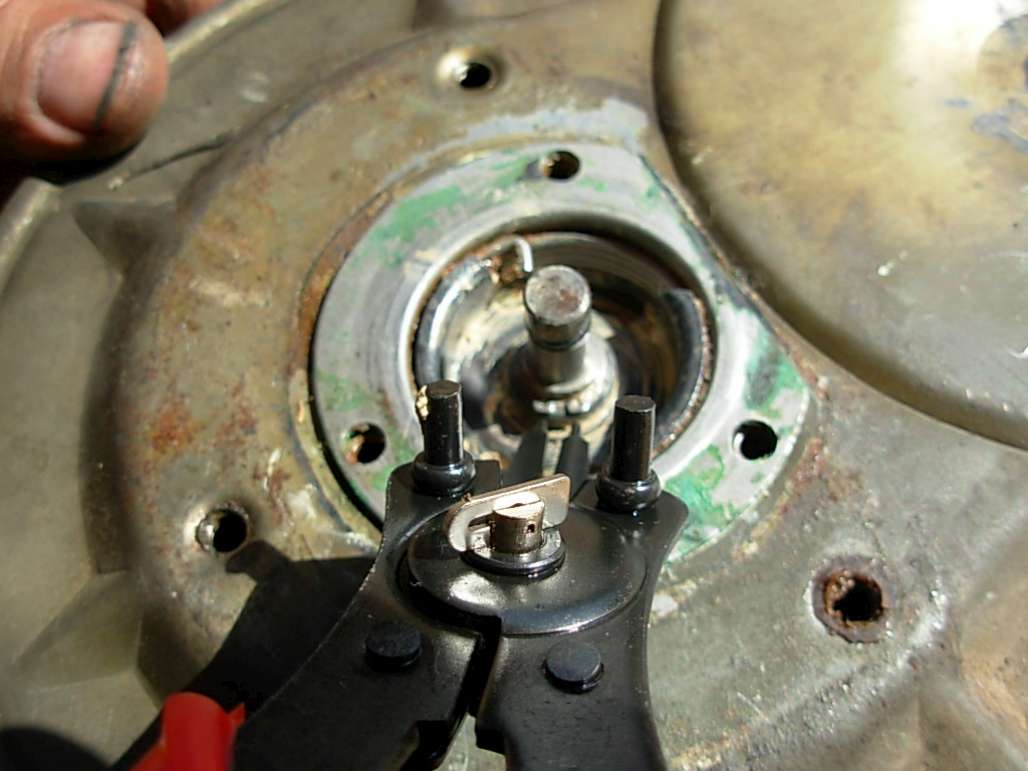

Next gently pry apart the case. Again you will want to walk your way around the case a little at a time. Be careful not to scrape the armature disc inside! One slip and it is junk... Just keep that screw driver from aimlessly probing inside the motor and you will be fine.

Nice... Sometimes the motor will look new on the outside and look like this on the inside, other times it will look rusty and old on the outside and be very clean on the inside. It all depends on how much water it was subjected to over the years.

Next, lift the inner cover off to reveal the disc shaped armature.

About now is when you might decide to just chuck it... Don't!!! The battle is not lost yet.
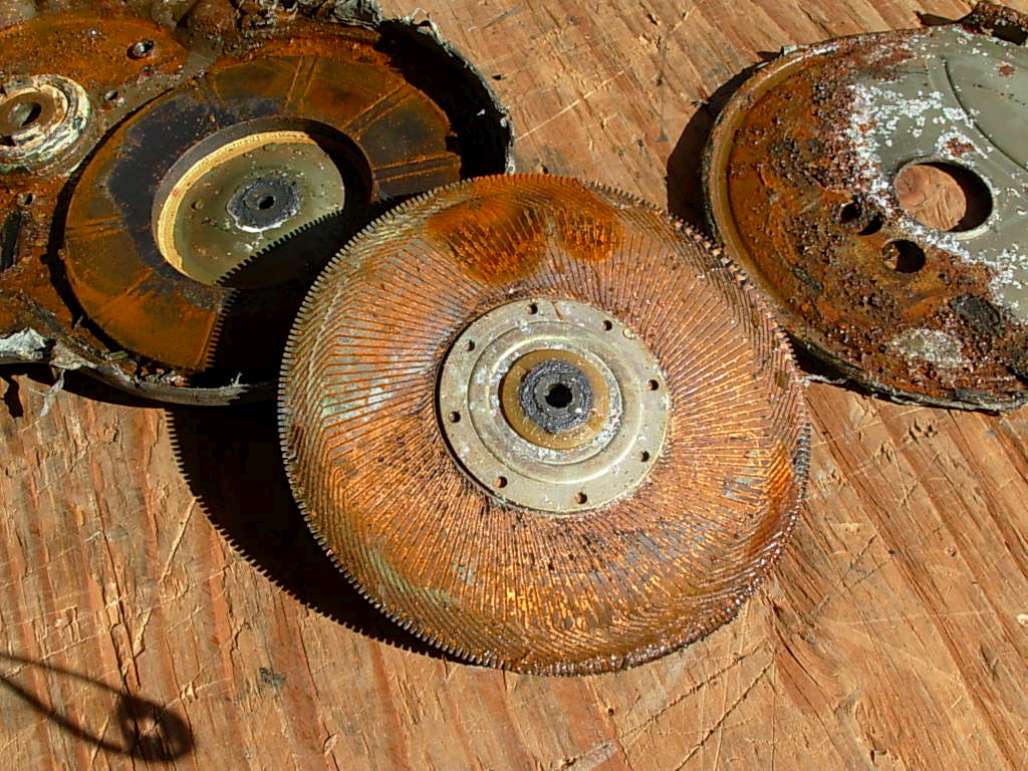
This disc appears to be OK. If the debris or parts of the brushes scar the face of this disc then it is no good. This one is dirty but seems to be unscathed and the gear attached to it is in fine shape.
Time to start scraping away the gunk.
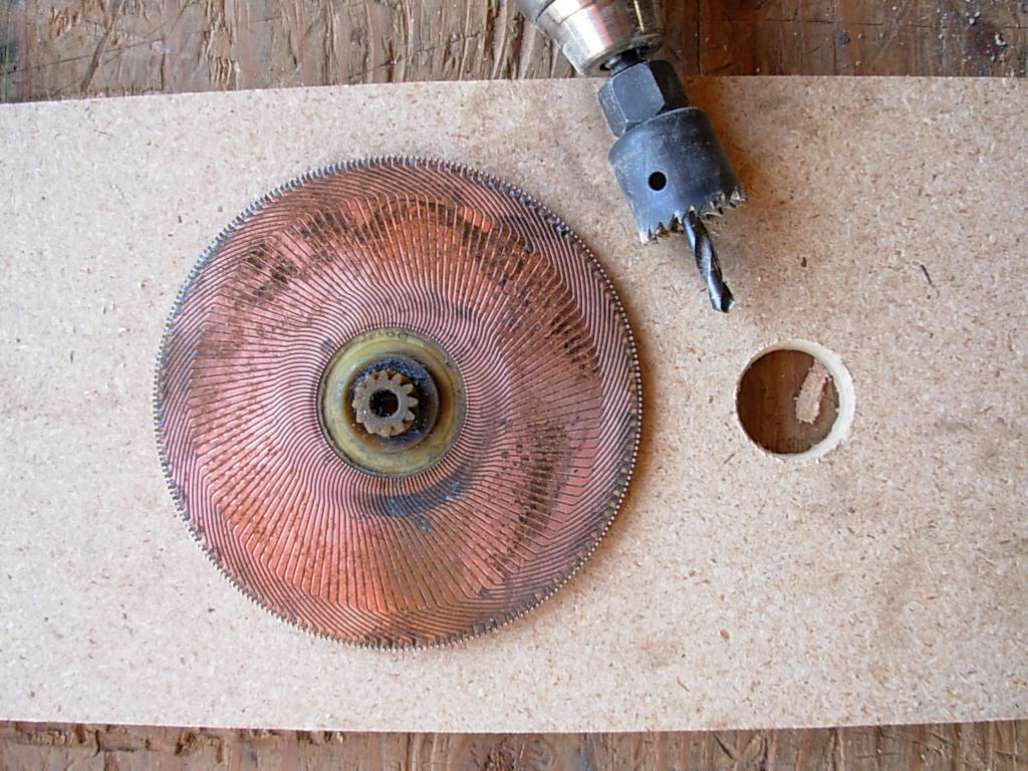
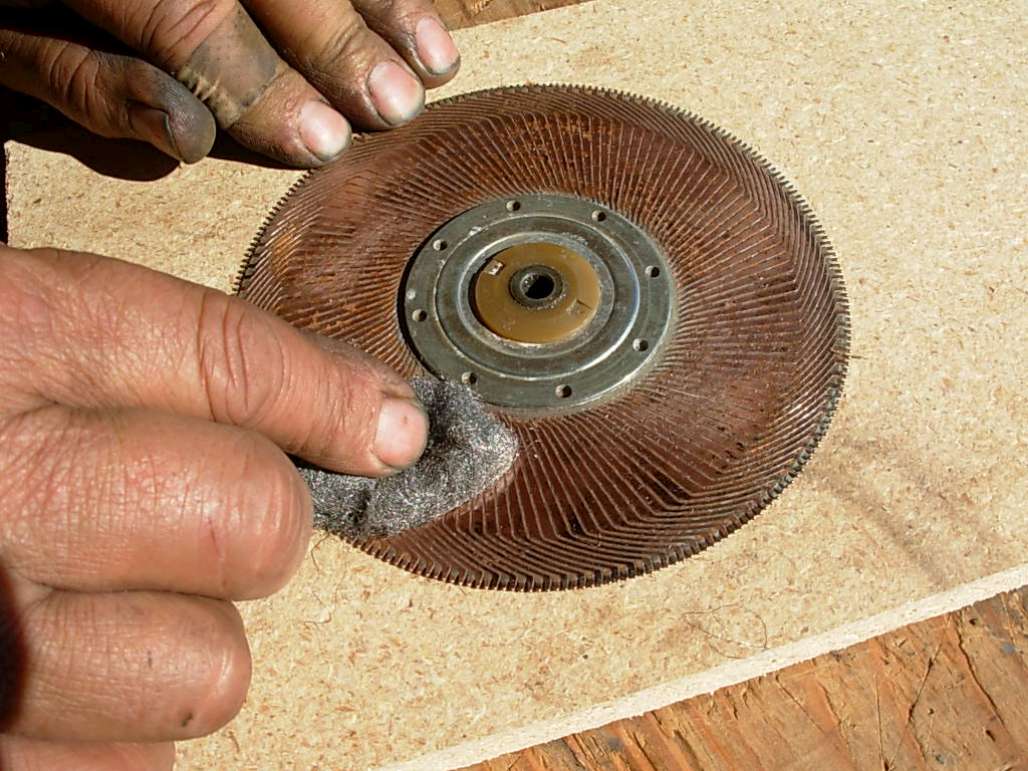
To clean the disc it needs to be on a smooth, flat clean surface, you do not want to bend this disc even a little bit. In order for it to lay flat you will need to drill a hole in a board so it can lay flush. Fine steel wool and good old elbow grease will polish the disc up. No sandpaper or anything that will damage the soft, delicate surface.

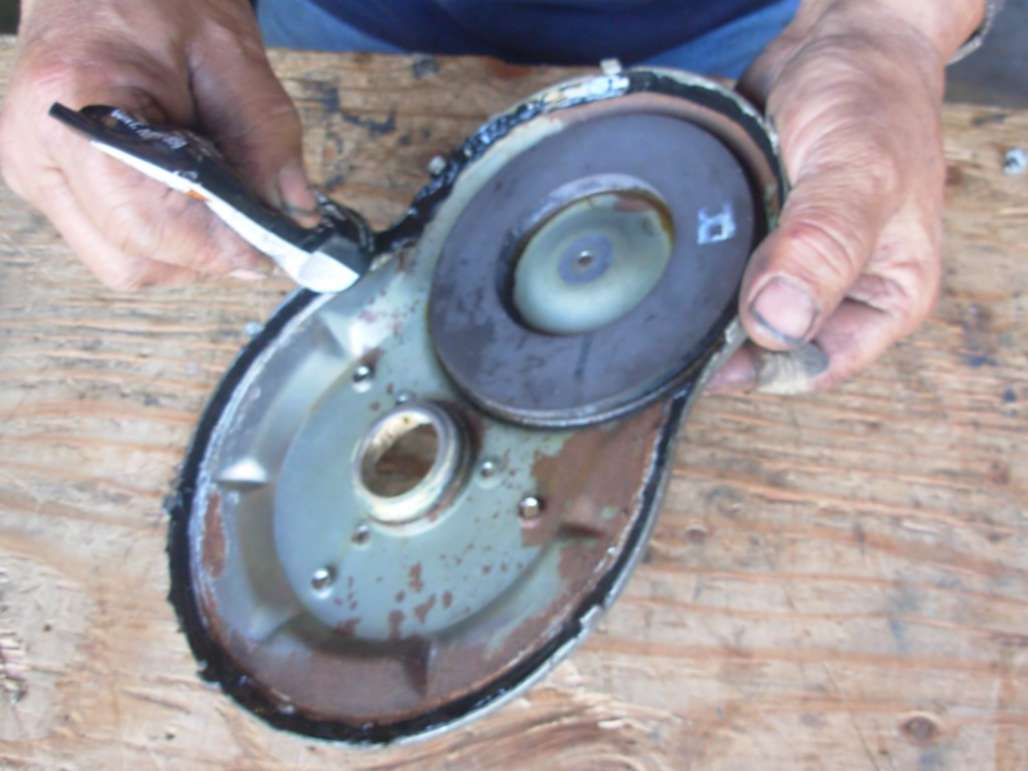
We used a metal lid the same diameter as the round magnet to protect the magnet before bead blasting the rusty motor housing. Do not try to remove the magnet as it is bonded to the case and will break very easily if disturbed.
A little brake cleaner got all the old grease off the gear inside and out.

The little brass bushing will pop right out of the center if you really want to clean in the hidden spots.

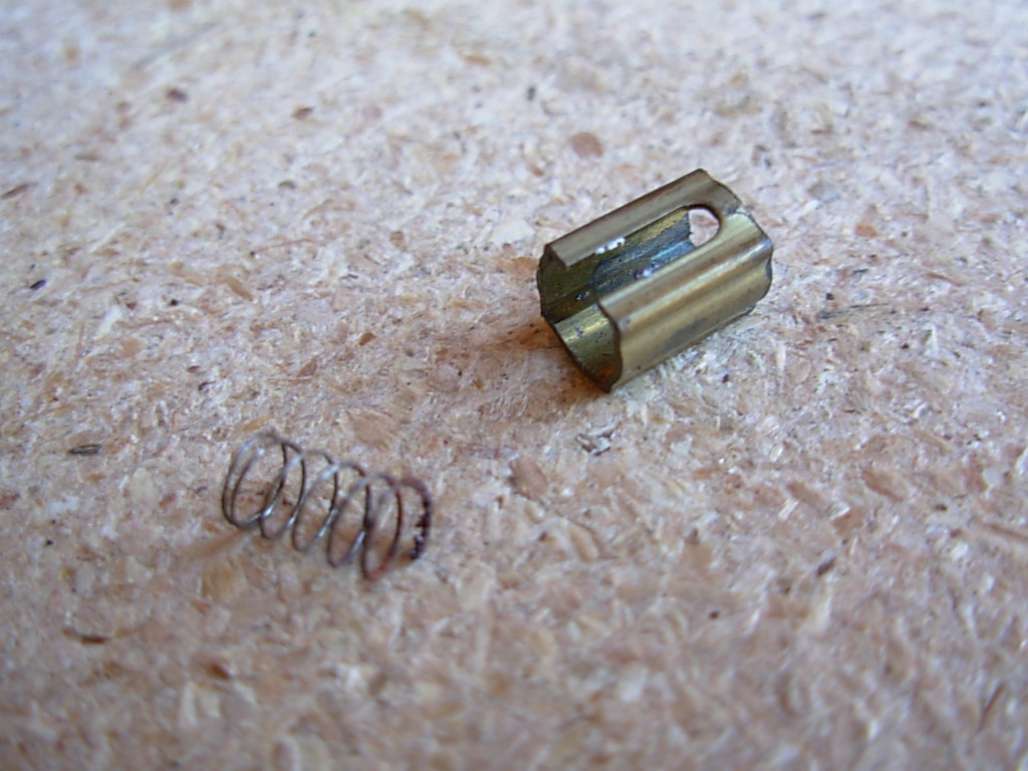
The picture above is showing how we scrape any corrosion off the inside of the brush housing with a small screw driver. Often the brushes are fine but are just stuck in place as the light duty spring beneath them cannot push them into contact with the disc because of debris lodging the brush in place.

The brushes shown are really in need of replacement but will still function. We are in search of the "perfect" spring replacement, the one shown above works OK but really has too much tension which would cause premature brush failure. The best brush replacement we have found to date is a pair of Nippon-Denso alternator brushes, ground down to fit.

Use a small brush to clean this gear, your bead blasting cabinet will be too harsh and will damage it.

Above is a picture of another motor with less water damage. It still had a usable spring that could be stretched a little to give the used brushes the right tension and ride height.

Apply white lithium grease to all moving parts. Really take your time and get the unit as clean as you can, little bits of rust will do a lot of damage over time.
After you have everything cleaned and put back in place you are ready for sealant. Windshield tape is a a good substitute, it has to be a rather thick substance as the seal also acts as a spacer, mating the two halve together with no more than silicone that has just been applied will not act as an adequate spacer. If you can hear the armature rubbing on the case as the motor turns your armature will be ruined in a short time. Be careful when you bring the two halves together as the magnet will want smack the two halves together hard and this will create havoc. When doing your first motor, having a capable assistant is not a bad idea. When this motor was buttoned back up it worked like a charm the first time! Who would have guessed it could be saved when we first laid eyes on the inside?
To test it, place 12 volts to it and then reverse the positive and negative leads to check that it works well in the other direction. This is a reverse polarity motor and does not need to be grounded to work. My rather "unscientific" way of testing these motors for adequate torque is to grind the drive gear into a block of wood while leaning hard into it. If that gear will bore a hole into a block of wood then it will most likely lift your 1/4 glass adequately.
No matter how well your rear windows work I suggest you use them sparingly and only put them up and down while standing over them helping them up or down with your hand. They were just never designed to last 40 years, you may be able to service them "this time" but what will you find the next time you open it up and do you really "want" to have to open them up again?

If you still do not want to take this task on yourself, you may be interested in our service that takes your motor and rebuilds it for you, click here.